Controlling RGB LED display with Raspberry Pi GPIO
by Ritesh
Posted on October 15, 2017 at 11.30 PM
Since I had no experience of projects based on GPIO pins of a development board, it took a long time to understand the concepts.
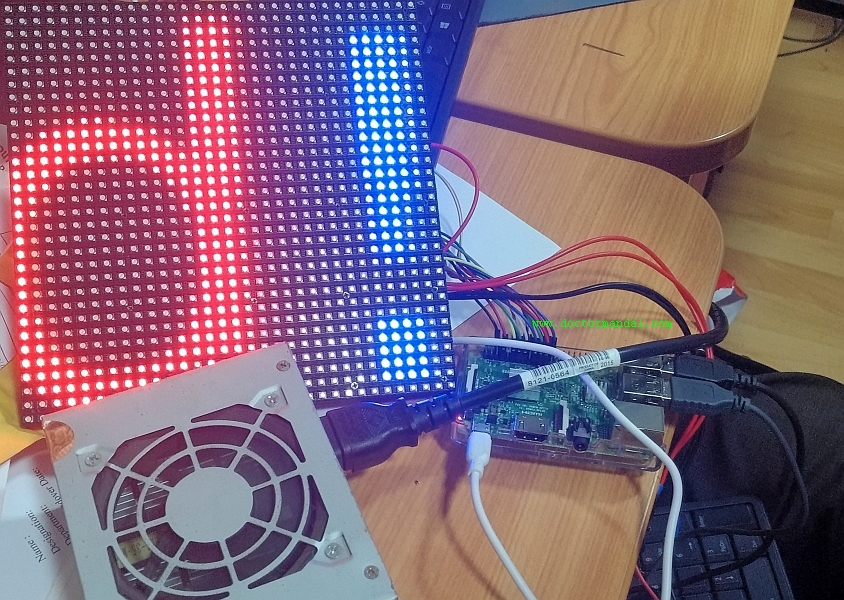
Hardware used for the Project:
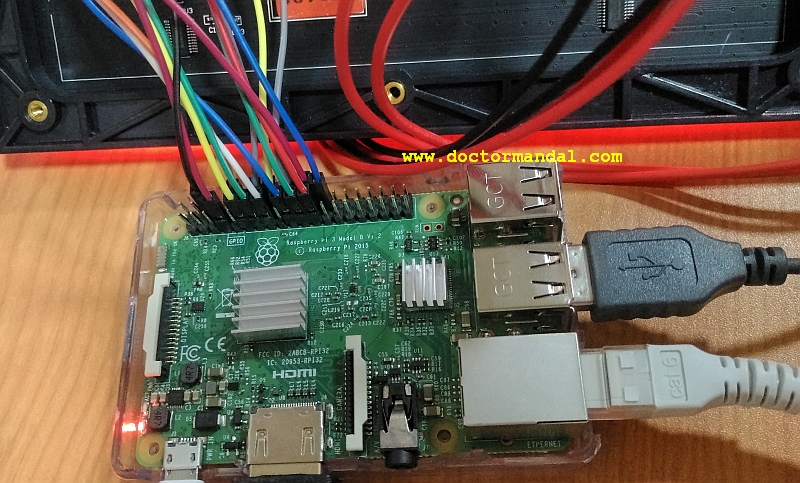
1. Raspberry Pi (I used one of my Raspberry Pi 3 MOdel B for the project).
2. RGB LED matrix 32 x 32 pixels, 162 x 162 mm, P6
3. 5 Volt, 2 Ampere Adaptor for powering the Raspberry Pi
4. 5 Volt power supply for the LED Matrix, from my old computer SMPS box
5. Female to female connectors
Preparing your Pi
Install raspbian in your Pi. I used Raspbian Lite for the project.Enable SSH to connect with your Pi without having to arrange for a monitor, keyboard and mouse everytime.
Using raspi-config enable the ssh (you should look for "Enable or disable ssh server" in the configuration options)
pi@raspberrypi:~ $ sudo raspi-configNow connect to your Pi via ssh (the default username and password is pi/raspberry). Update the packages/repository
pi@raspberrypi:~ $ sudo apt-get update
A note on SPI and I2C Interfaces of Raspberry Pi
There is no need to enable Serial Peripheral Interface (SPI) and Inter-Integrated-Circuit bus (I2C) for the projectInstall the gpio package
pi@raspberrypi:~ $ sudo apt-get install rpi.gpio
pi@raspberrypi:~ $ sudo apt-get install python-dev python-imaging
Download the software library maintained by Henner Zeller. The software library for the project is found here.
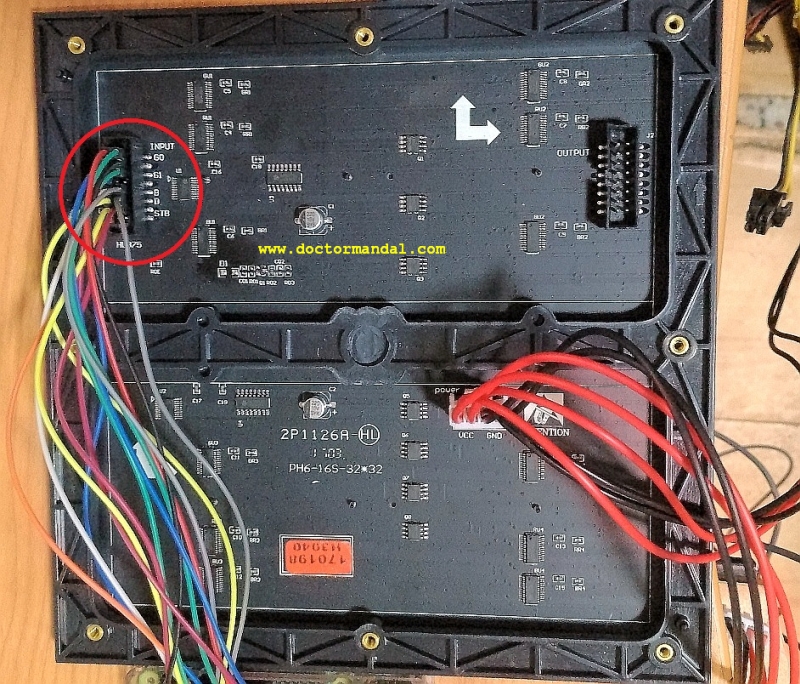
Connections
40 Pin GPIO Connection to HUB75 socket of matrix | |||
| Connection | Pin | Pin | Connection |
|---|---|---|---|
| Blank | Blank | ||
| Blank | Blank | ||
| Blank | GND | ||
| STB (strobe) | Blank | ||
| Blank | Blank | ||
| CLK (clock) | OE | ||
| G0 | Blank | ||
| A | B | ||
| Blank | C | ||
| B1 | Blank | ||
| G1 | D | ||
| R0 | R1 | ||
| Blank | B0 | ||
| Blank | Blank | ||
| Blank | Blank | ||
| Blank | Blank | ||
| Blank | Blank | ||
| Blank | Blank | ||
| Blank | Blank | ||
| Blank | Blank | ||
The onboard sound module of the Raspberry Pi is not compatible with the library. If you run the default demo, the set up fails to work but it provides resolution step as well in ther error message. (shown below). I have detailed how to disable onboard sound of Raspberry Pi in a section below.
root@raspberrypi:/home/pi/display32x32/rpi-ritesh/examples-api-use# ./demo   -t 90 -D 1 ritesh.ppm

=== snd_bcm2835: found that the Pi sound module is loaded. ===
Don't use the built-in sound of the Pi together with this lib; it is known to be
incompatible and cause trouble and hangs (you can still use external USB sound adapters).

See Troubleshooting section in README how to disable the sound module.
You can also run with --led-no-hardware-pulse to avoid the incompatibility,
but you will have more flicker.
Exiting; fix the above first or use --led-no-hardware-pulse

root@raspberrypi:/home/pi/display32x32/rpi-ritesh/examples-api-use#
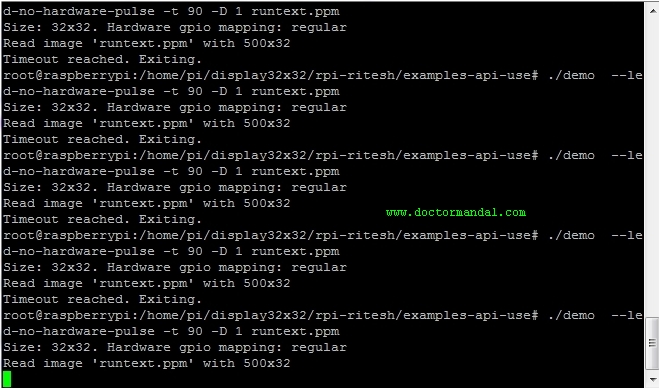
The same code above with a flag "--led-no-hardware-pulse" works fine.
The other way to permanently fix this issue is to disable the onboard Raspberry audio.root@raspberrypi:/home/pi/display32x32/rpi-ritesh/examples-api-use# ./demo --led-no-hardware-pulse -t 90 -D 1 ritesh.ppm Size: 32x32. Hardware gpio mapping: regular Read image 'ritesh.ppm' with 500x32
Disabling onboard audio of Raspberry Pi
Navigate to /etc/modprobe.d , Add the line "blacklist snd_bcm2835" to raspi-blacklist.conf
root@raspberrypi:cd /etc/modprobe.d#
root@raspberrypi:/etc/modprobe.d# ls
blacklist-rtl8192cu.conf  fbdev-blacklist.conf  libpisock9.conf
blacklist-rtl8xxxu.conf   ipv6.conf             raspi-blacklist.conf
root@raspberrypi:/etc/modprobe.d# nano raspi-blacklist.conf

Press Ctrl+O to save the file (Nano)
and then reboot.

Test the disabled audio.
root@raspberrypi:/home/pi/display32x32/rpi-ritesh/examples-api-use# aplay -l
aplay: device_list:268: no soundcards found...
root@raspberrypi:/home/pi/display32x32/rpi-ritesh/examples-api-use#