Installing pfSense Firewall on a Virtual Machine
by Ritesh
Posted on September 17, 2017 at 7:00 PM
I used Qemu/KVM as Virtual machine to install pfSense. pfSense is a cool open source (Community edition of pfSense is free) firewall Linux distro with lots of professional features.
Download pfsense ( iso.gz ) file from their Website. Select architecture (32 bit or 64 bit). I have downloaded AMD64 version and it works both with Intel and AMD 64 bit architecture.

Before you plan to install pfSense, make sure that your computer has atleast 2 Physical Network interfaces. With only one physical interface, pfSense won't work if you create virtual interfaces.
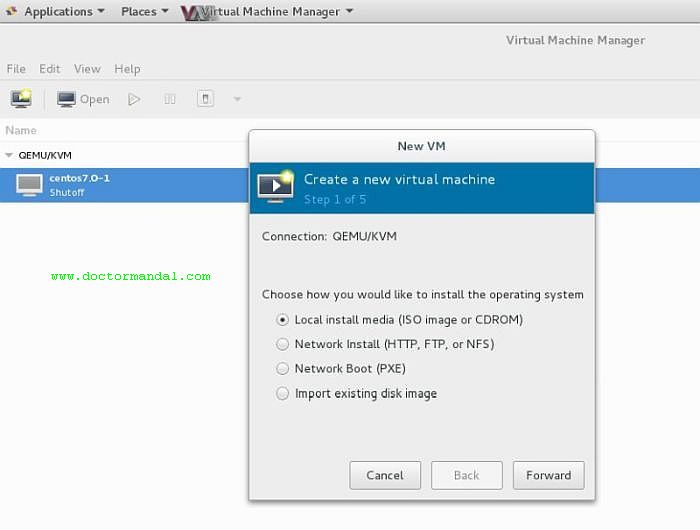
Start Virtual Machine Manger by typing virt-manager in a terminal window. Locate the pfsense iso copied to the Harddisk. Choose local Storage as Installation source.

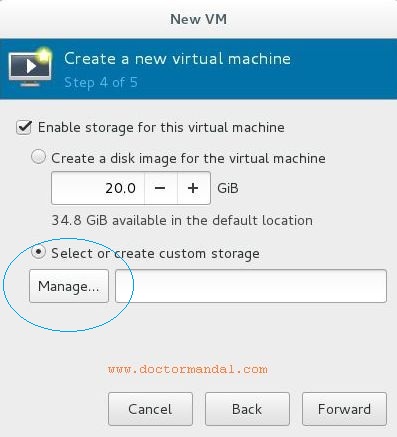
Select default "Create a disk image for the virtual machine" if there is sufficient space in the default pool / primary paritition. Else click on the "select or create custom storage" option and click "Manage" button to create storage pool in another partition in the HardDisk.
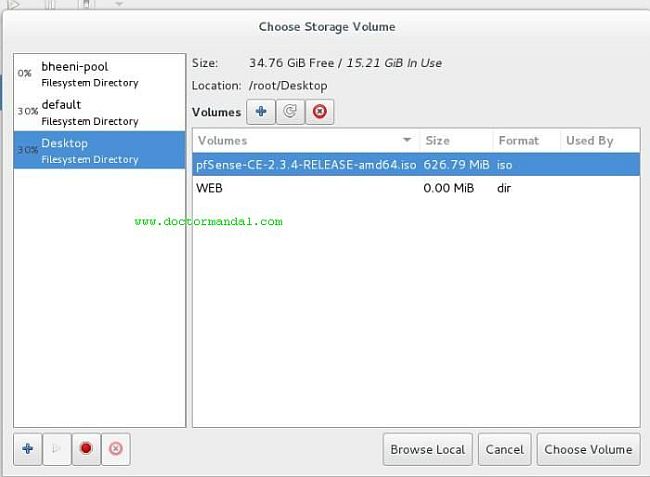
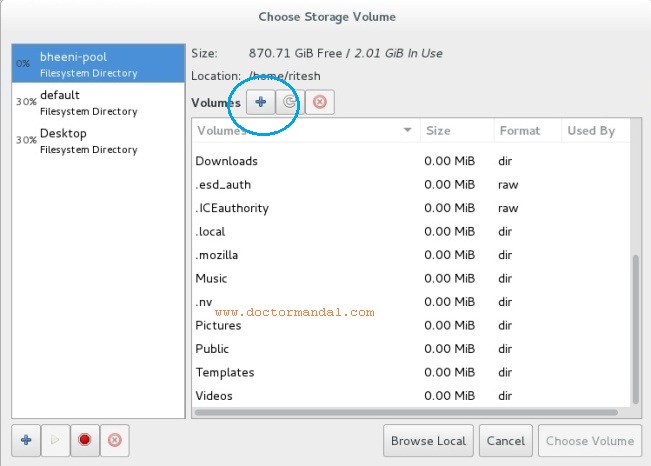
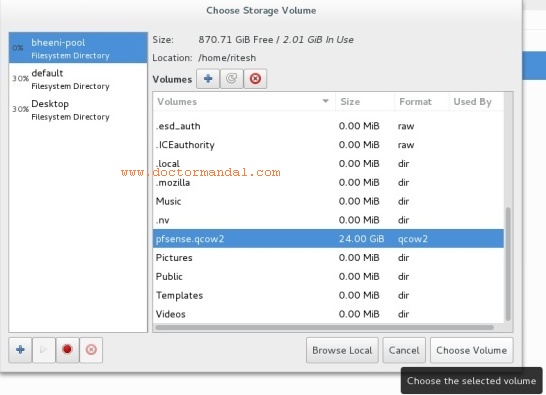
Select the pool and click on the "+" to create storage volume for pfSense installation.
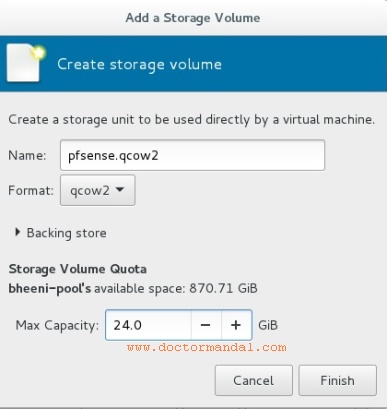
Provide a name of the Volume for pfSense.
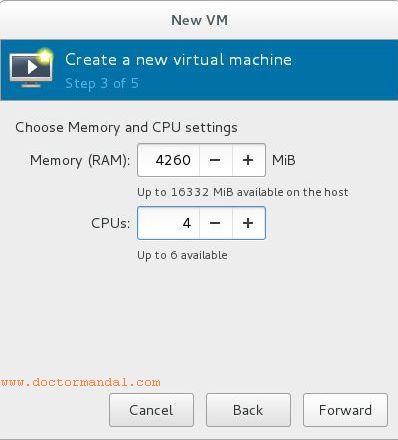
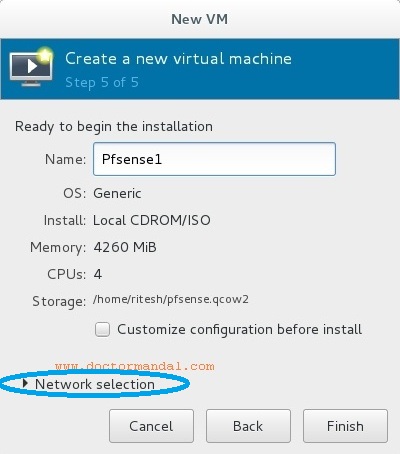
Click on the "Customize configuration before install" option. We need it to add atleast 2 network interfaces.
Select macvtap in bridge mode to mimick the virtual Network interface as physical interface bypassing the Host machine. Note : macvtap doesnot work with Wireless interface (In that case try to use NAT).


Add the second network interface with the different physical interface with same settings as we did for the 1st interface (macvtap + bridge).

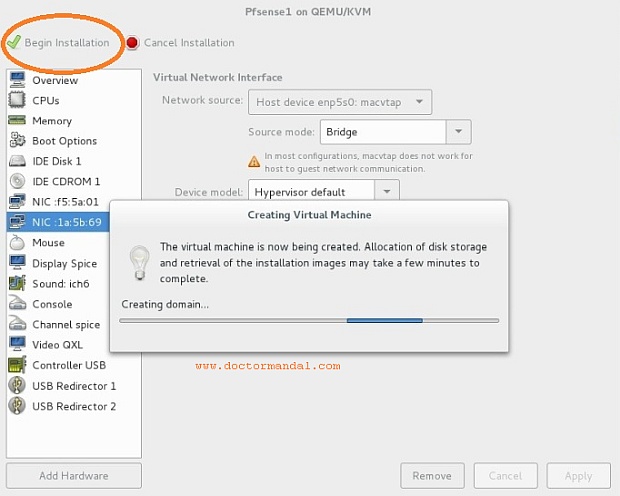
And at last click the "Begin Installation" button at the top.